vim使用termdebug
1. 升级vim至8.1 (请参考这里)
ubuntu16.04安装步骤摘录如下:
-
删除系统自带的vim
sudo apt-get remove –purge vim-tiny vim vim-runtime vim-common vim-gui-common vim-nox
- 克隆vim代码
git clone https://github.com/vim/vim.git
cd vim
-
配置vim
./configure –with-features=huge
–enable-multibyte
–enable-rubyinterp=yes
–enable-python3interp=yes
–with-python-config-dir=/usr/lib/python3.5/config-3.5m-x86_64-linux-gnu
–enable-perlinterp=yes
–enable-luainterp=yes
–enable-gui=gtk2
–enable-cscope
–prefix=/usr/localwith-python-config-dir路径改成自己的
-
编译与安装
make VIMRUNTIMEDIR=/usr/local/share/vim/vim81
sudo make install
2. 升级gdb至最新版本
gdb升级到7.12版本以上
sudo add-apt-repository ppa:ubuntu-toolchain-r/test
sudo apt-get update
sudo apt-get -y –force-yes install gdb
gdb –version
sudo add-apt-repository –remove ppa:ubuntu-toolchain-r/test
sudo apt-get update
3. 使用termdebug
以如下代码为例(testTermdebug.cpp):
#include <iostream>
using namespace std;

void fun(int *a)
{
    cout << *a << endl;
    *a++;
}

int main()
{
    cout << "Hello +1s" << endl;
    int num = 10;
    fun(&num);
    cout << "Bye" << endl;

    return 0;
}
使用-g参数编译代码
g++ -g testTermdebug.cpp -o testTermdebug
vim打开待调试代码,输入:
:packadd termdebug
启动termdebug
:Termdebug testTermdebug.cpp
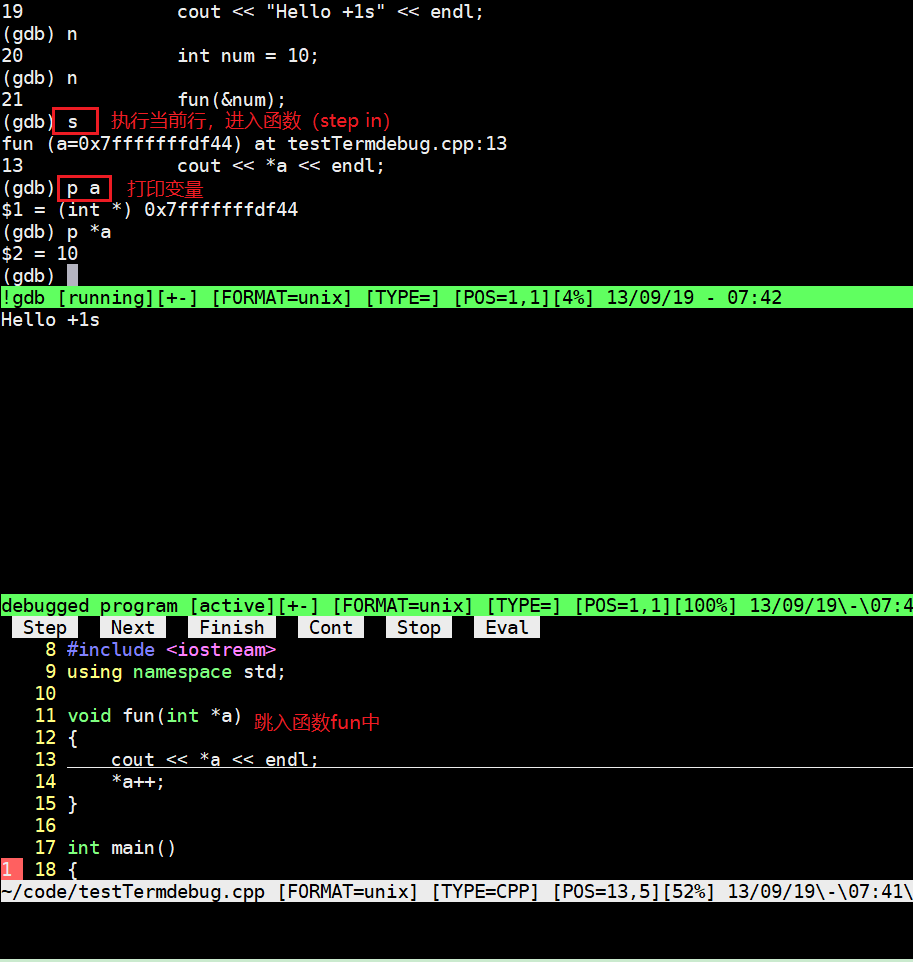
可以看到窗口变成了这样:

愉快地调试吧:

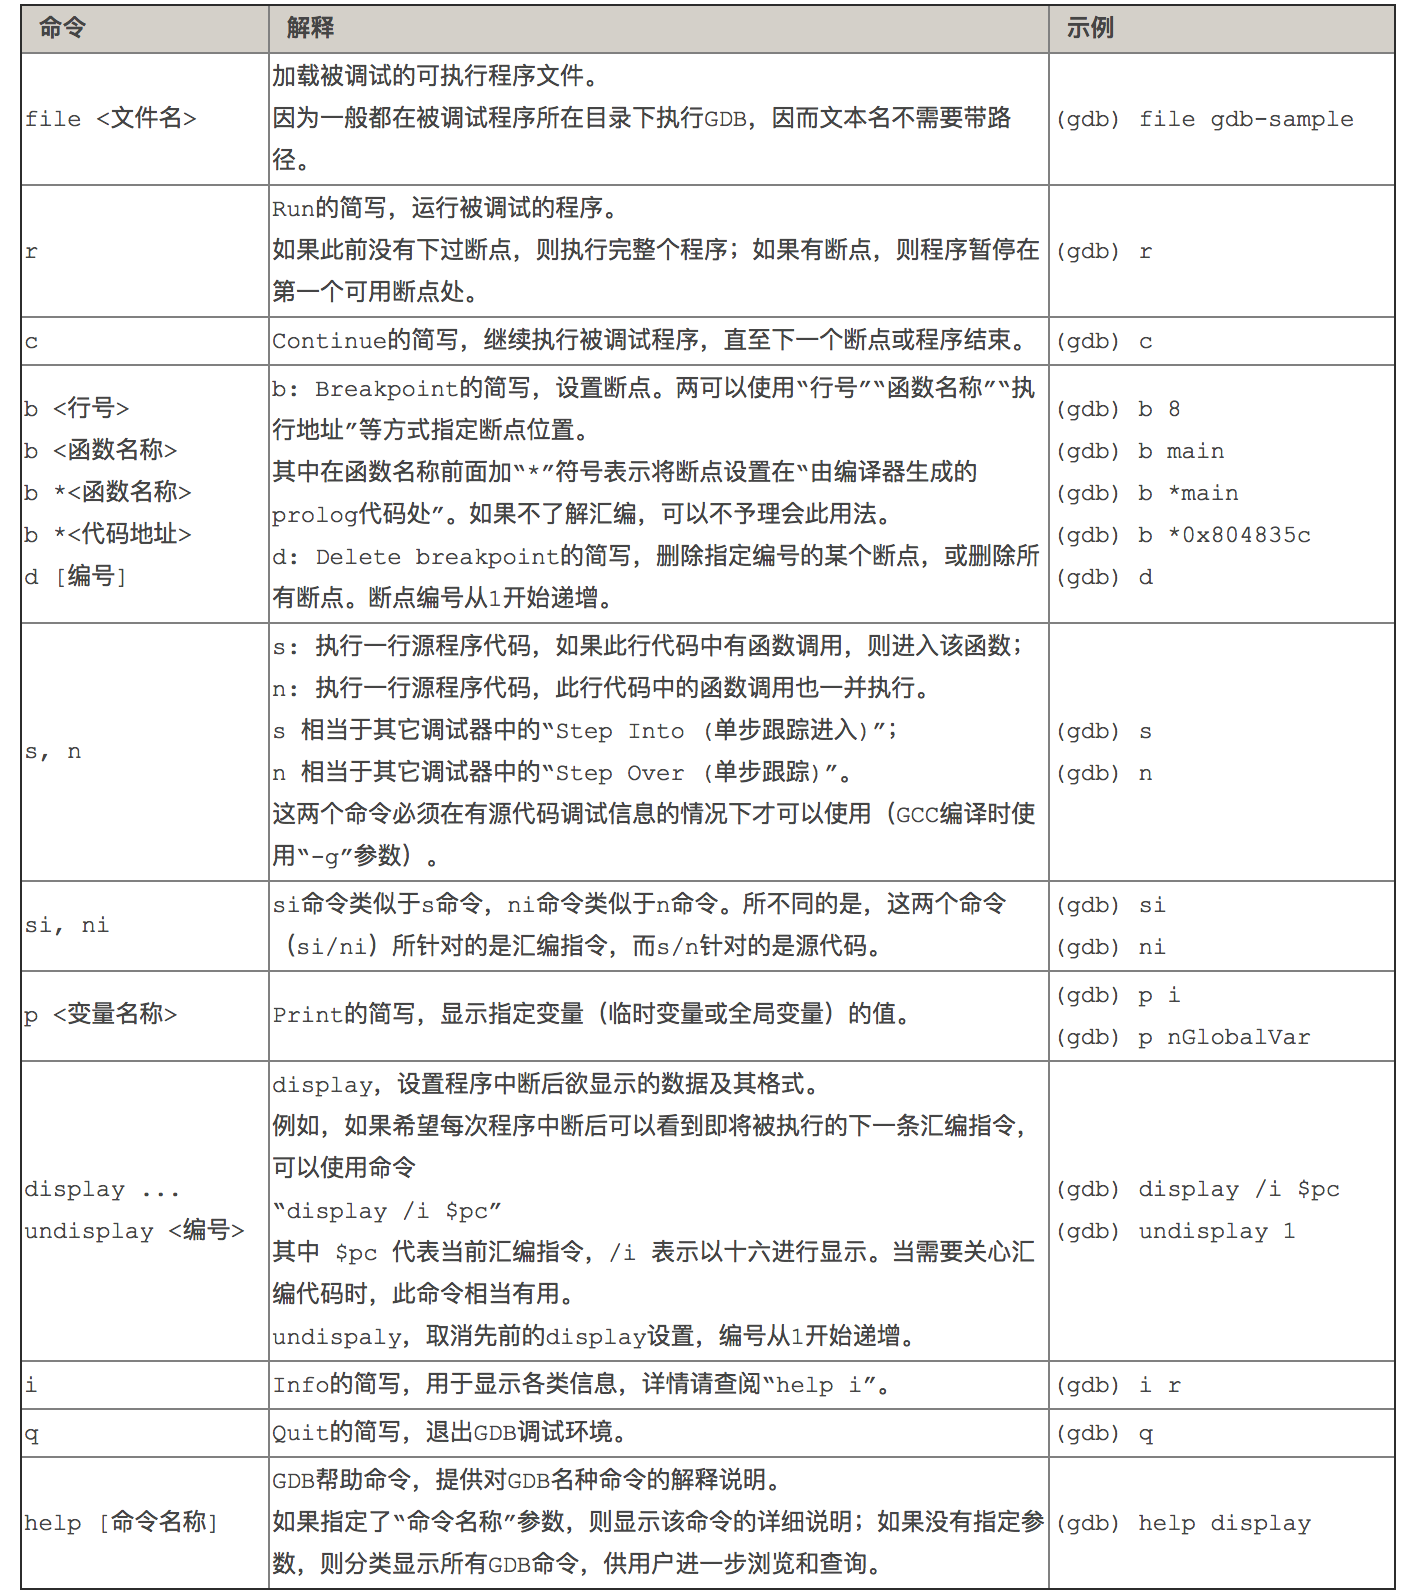
4. gdb 调试命令
下图来自于这里(https://www.jianshu.com/p/87e501e5b2f7)
5. 编辑.vimrc实现按键映射
如果感觉每次输入termdebug命令太麻烦,可以使用按键映射,在.vimrc中写入:
"use termdebug
map <F10> :call Runtermdebug()<CR>
func! Runtermdebug()
    exec "w"
    if &filetype == 'c'
        exec "!gcc % -g -o %<"
    elseif &filetype == 'cpp'
        exec "!g++ % -g -o %<"
    endif
    exec "packadd termdebug"
    exec "Termdebug %<"
endfunc
之后vim打开源代码,按下F10就进入调试状态了